"I want the dog sharp, even though it won't sit still." "I want this dark room to stay dark." For photos like these, you set the shutter or the ISO yourself.
Chobial has no exposure modes. There's no P, S or M to pick. What you touch is what you set. If you touch nothing, the camera sets the ISO and the shutter for you.
What ISO and shutter change
- Shutter speed: how long the camera takes to make the picture. A fast shutter freezes motion, and a slow one blurs it.
- ISO: how bright the camera makes the picture. A high ISO lets you shoot in less light, but it adds noise.
Set the ISO
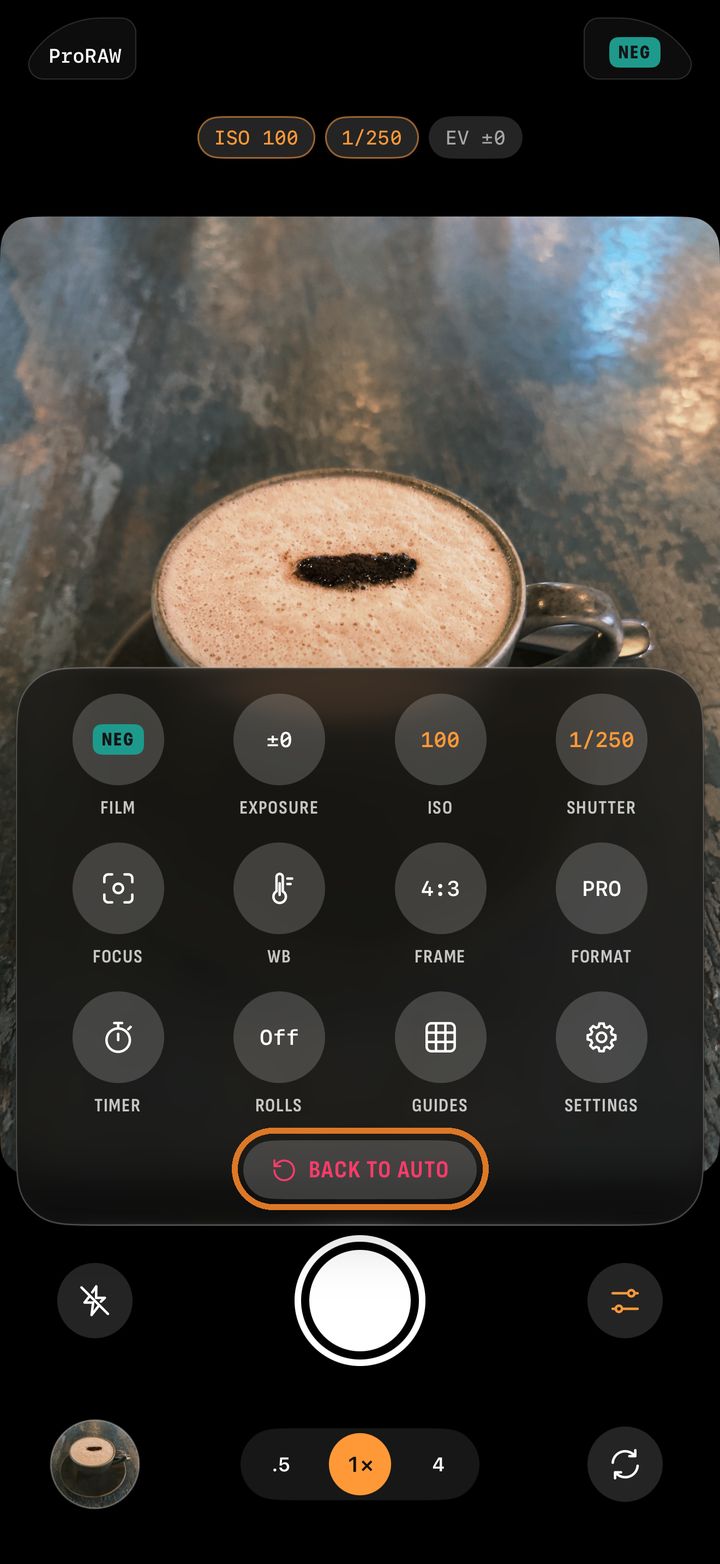
- Tap Controls, then ISO. You can also tap the ISO value in the exposure line at the top of the screen.
- The panel turns into one dial across the bottom. Slide it sideways. Each tick is a click.
- The ISO value turns orange in the exposure line. Orange means you set it by hand.
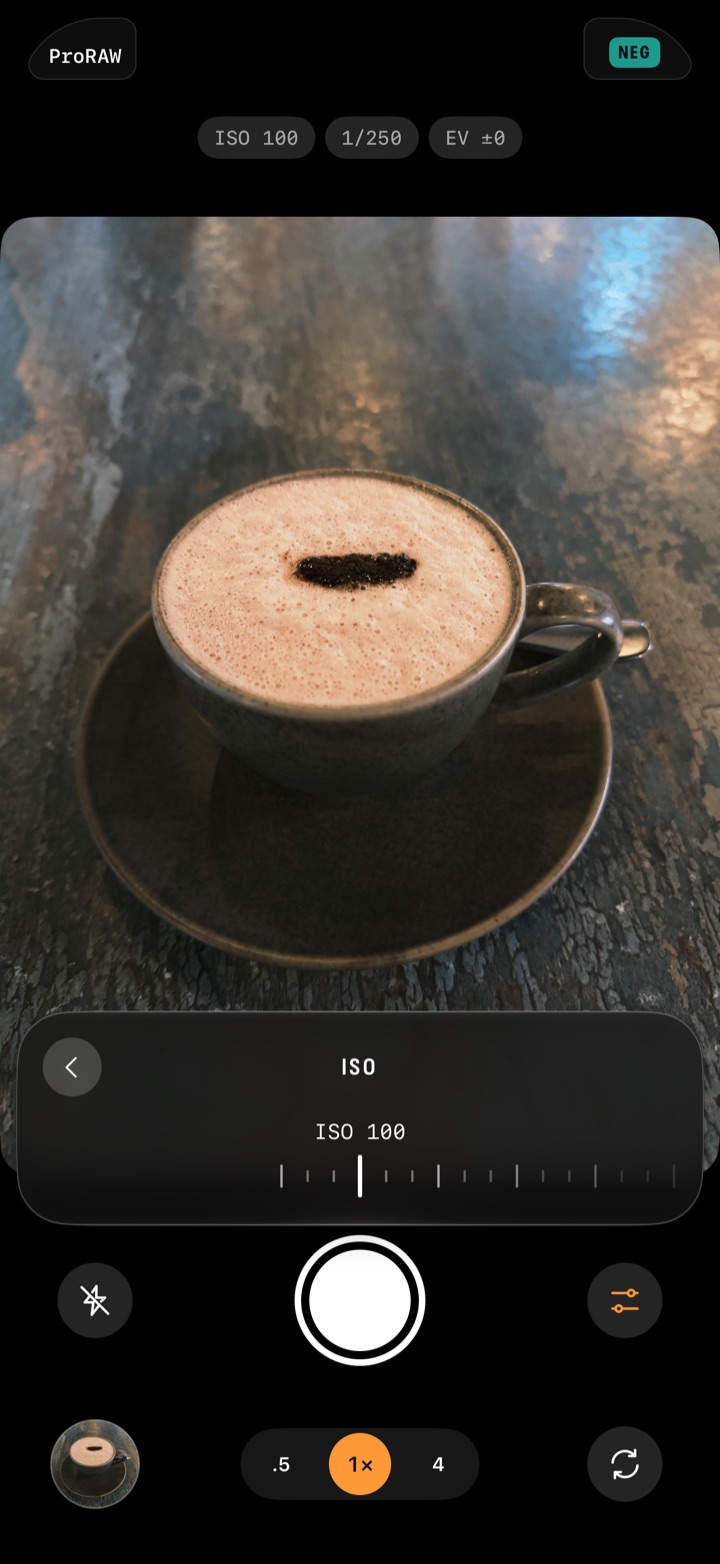
The camera keeps setting the shutter for you. The dial's range comes from your phone and the lens you're using, so it isn't the same on every iPhone.
Set the shutter
- Tap ‹ to go back to the controls.
- Tap Shutter and slide the dial.
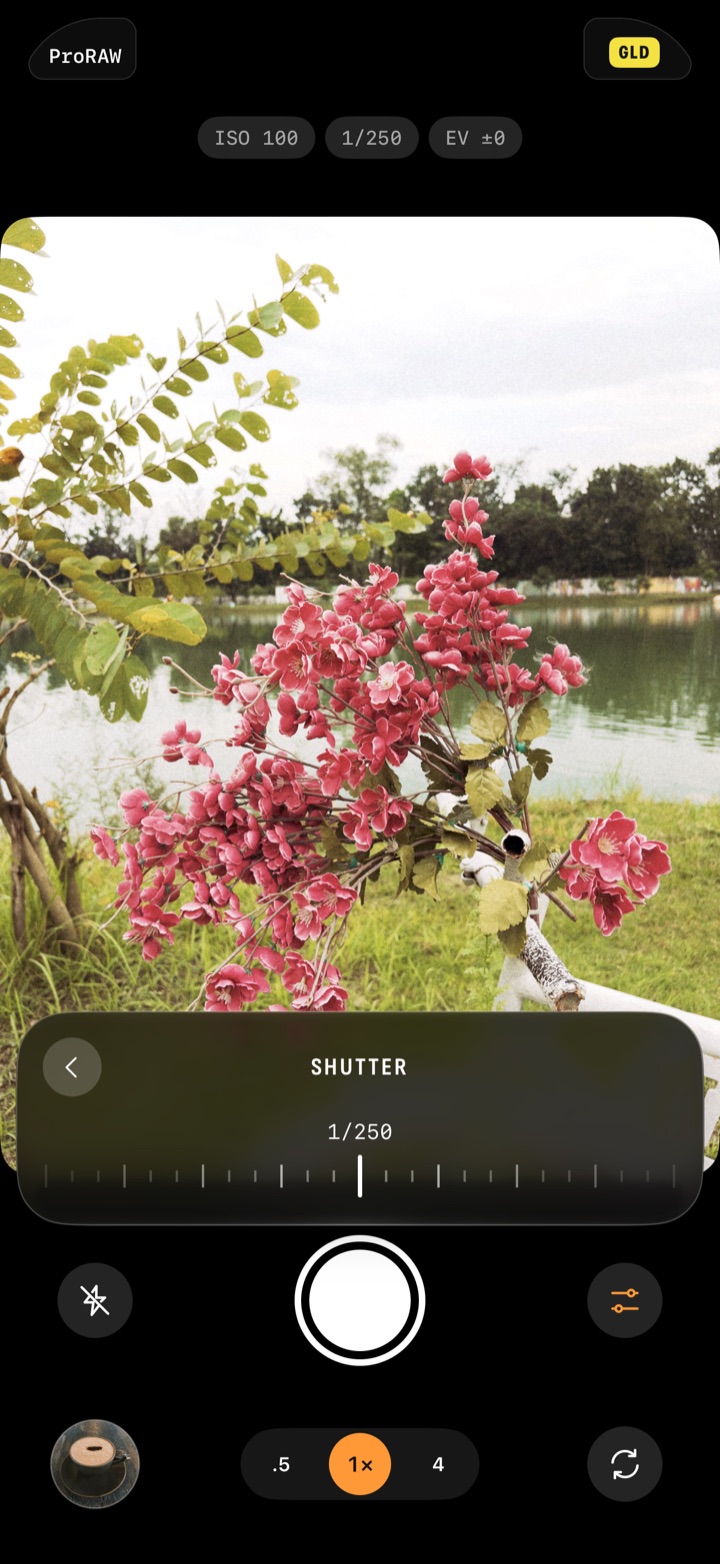
The camera keeps setting the ISO for you. If you set the ISO too, you set both values yourself. The EV number in the exposure line then turns grey. It shows how far your settings are from what the camera would choose, and you can't change it.
Sometimes the camera can't reach the brightness you asked for. Then the value it sets turns red. Say you set the shutter to 1/2000 s and push EV to +3 in a dim room. ISO can't go that high, so the ISO value turns red.
When the camera follows a person or a pet and sets the exposure itself, it keeps the shutter at 1/125 s or faster.
Make the photo brighter or darker
You can also leave ISO and shutter to the camera and only change the brightness. This is called exposure compensation. It also works when you set one of them. Then the brightness changes the other one.
- Tap the picture. A sun appears beside the focus box.
- While the sun shows, drag up to make the photo brighter, or down to make it darker. Each step is a third of a stop.
- For a dial, tap the exposure value in the exposure line.
- Tap Reset on that dial to go back to zero.
Give it back to Auto
- Tap Auto on a dial to give that one value back to the camera.
- Back to Auto in the panel gives back the ISO and the shutter.
On an iPhone with Camera Control, you can do this without opening the panel. Light-press the button, then light-press twice to choose Exposure, ISO or Shutter. Then slide your finger on the button.
Check the light with the histogram and zebras
- Tap Controls › Guides.
- Tap Histogram. It shows in a corner of the picture.
- Tap Zebras. Stripes show over the bright parts that are about to lose all their detail.
A guide that's on is orange. To change when the zebras start, go to Settings › Zebras.
If you see stripes on the sky, make the shutter faster, lower the ISO or drag down on the picture. The histogram post shows how to read the graph.
Edit later: fix the light in the editor
Chobial shoots RAW by default, with ProRAW on Pro iPhones. So a photo that came out too dark isn't lost. Open it in the editor and use the Light tool. Exposure goes from −3 to +3, and Highlights and Shadows bring back the bright and dark parts.
If only a face came out too dark, you can brighten just the face. The Light help page has the steps.
Each photo keeps its original. Every camera setting and every edit stays with that original.